DIY: Drip Dresser
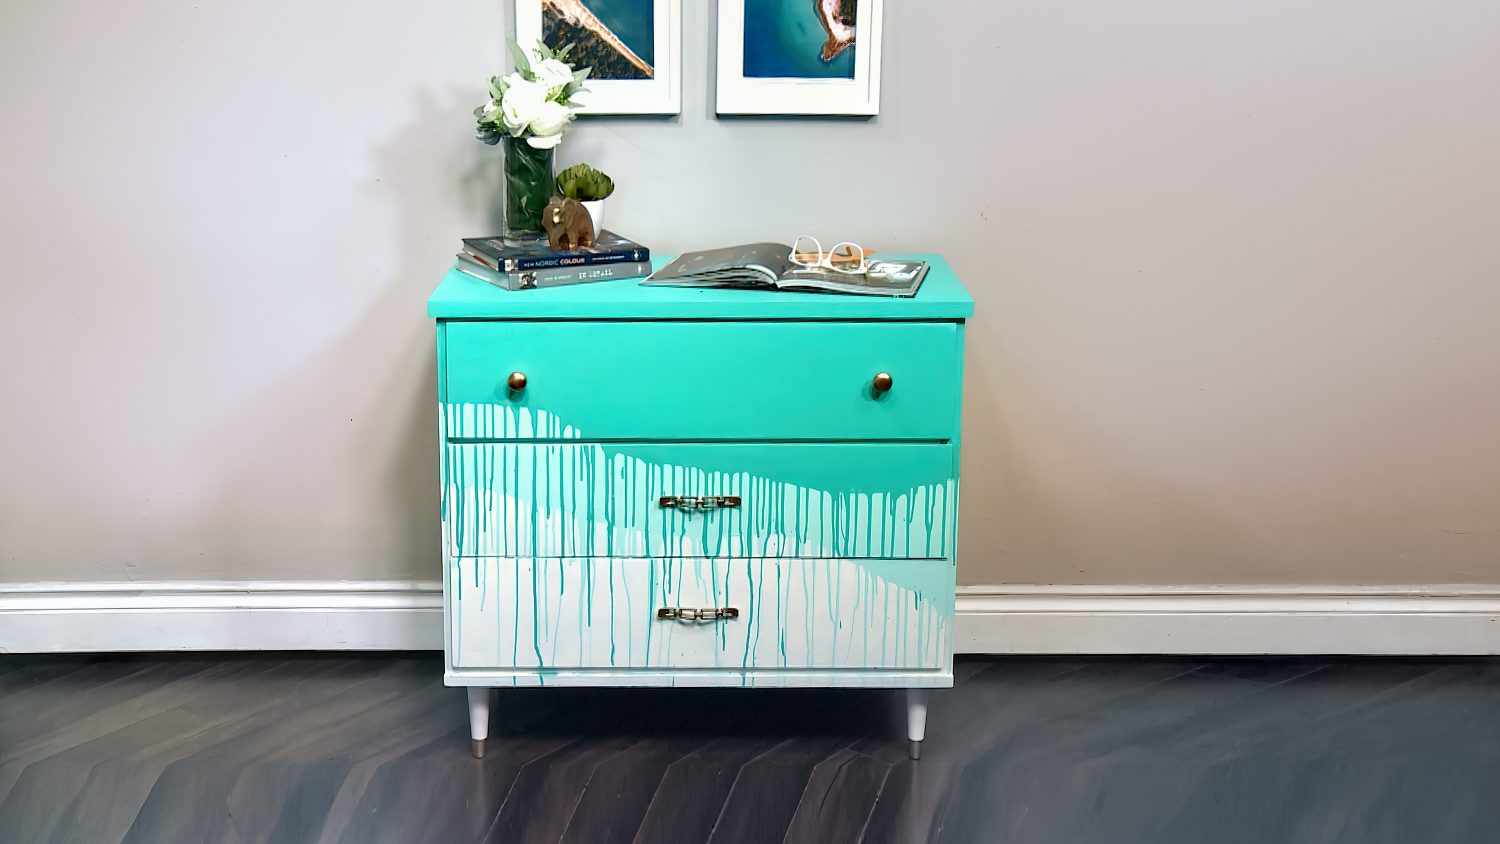
What if you have a solid piece of furniture, but it needs a little bit of an update? In this episode of The Marc and Mandy Show: Do-It-Yourself, Marc and Mandy show how to make a drip design dresser. Check out the video above or keep reading for the step-by-step instructions.
What you’ll need: a furniture piece, paint brushes, white primer, two top coats in the same color family,
DIY instructions:
- First, pick out a great piece. It should be a clean line piece of furniture. So, nothing too ornate and it should have simple, straight edges to it.
- Next, apply a white paint primer to the piece as a base.
- Once your base coat dry you can start applying your the lighter shade of your top coats. Use this color to create a wave effect across the midpoint of the fyour furniture.
- Next, use the darker shade of your top coats to create a similar wave on the top of the furniture piece. You should now have a two-toned wave covering a portion of your furniture peice.
- To create the drip, start with your lighter color and dab along the edge of your light color wave and simply let the paint drip down. If your paint is not dripping, add some water to your paint to make it runnier. Repeat this step with your darker paint.
For the full DIY instructions, check out the video above!
Thanks for tuning in to The Marc and Mandy Show! Leave a comment below, We’d love to hear from you!
Visit marcandmandy.com for show times and schedules.
Keep in Touch with Us… Everywhere!
Facebook: https://www.facebook.com/marcandmandy/
Twitter: https://twitter.com/MarcAndMandy
Instagram: https://www.instagram.com/marcandmandyshow/


