Clay Candle Holder
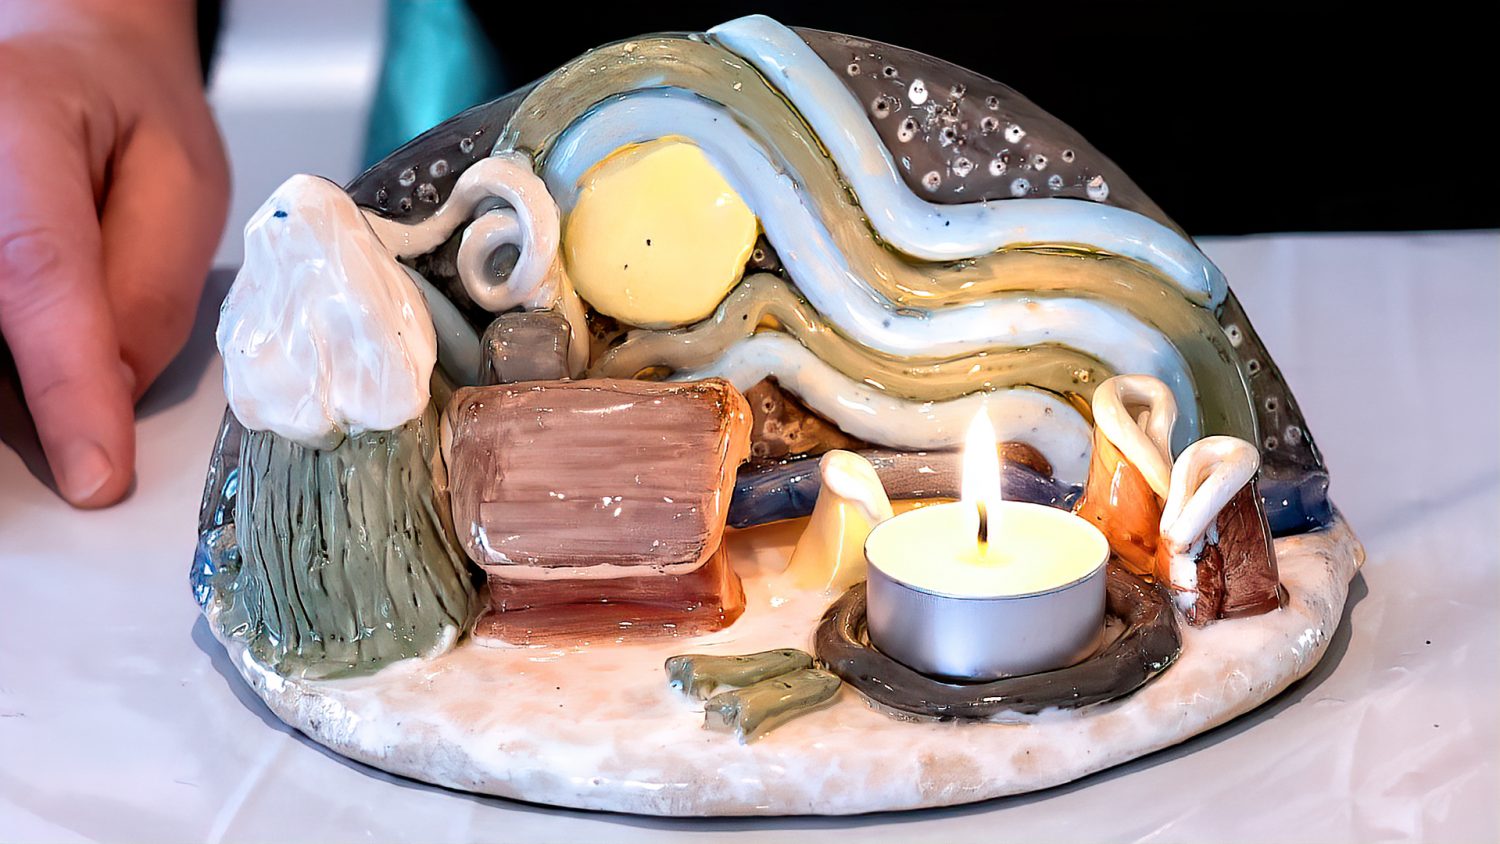
If you’re in the mood to get lit, (literally), you’ve come to the right place. On this episode of The Marc and Mandy Show, Kelly Edmonson of Clay For Kids shows viewers how to DIY a beautiful clay candle holder. To learn more, check out the video above or keep reading for the written instructions.
What you’ll need: clay, glaze, and paintbrushes
Step 1: Create Your Base
Start out project with a round base, which you will pound out out of clay. (For an example of size and thickness, check out the visual in the video above.) Once you have your circular clay base, push up one side to create the background.
Step 2: Mold
Anything you want to make out of clay starts out with worm-shaped cylinders and balls. Use the worm-and ball-shaped pieces to form the designs on the backdrop. (Don’t forget to make a spot to put your candle later on!) Mold and add clay pieces until you are happy with your design.
Step 3: Glaze
At this stage, you can begin to add glaze. Use glazes of different tints to paint your backdrop as desired. Once you’re happy with it, you can fire your creation in the kiln and then dip it in clear glaze as a finishing touch.
About Clay For Kids:
Established in 1981, Clay for Kids is Alberta’s premiere Mobile Art Studio. They specialize in clay building, glass fusion, and pottery wheel instruction for all ages. Clay For Kids has locations serving the Calgary and Edmonton areas. To learn more, visit the Clay For Kids website.
Thanks for tuning in to The Marc and Mandy Show! Leave a comment below, We’d love to hear from you!
Keep in Touch with Us… Everywhere!
Facebook: https://www.facebook.com/marcandmandy/
Twitter: https://twitter.com/MarcAndMandy
Instagram: https://www.instagram.com/marcandmandyshow/
