DIY Tie Dye Pillow with Sharpies
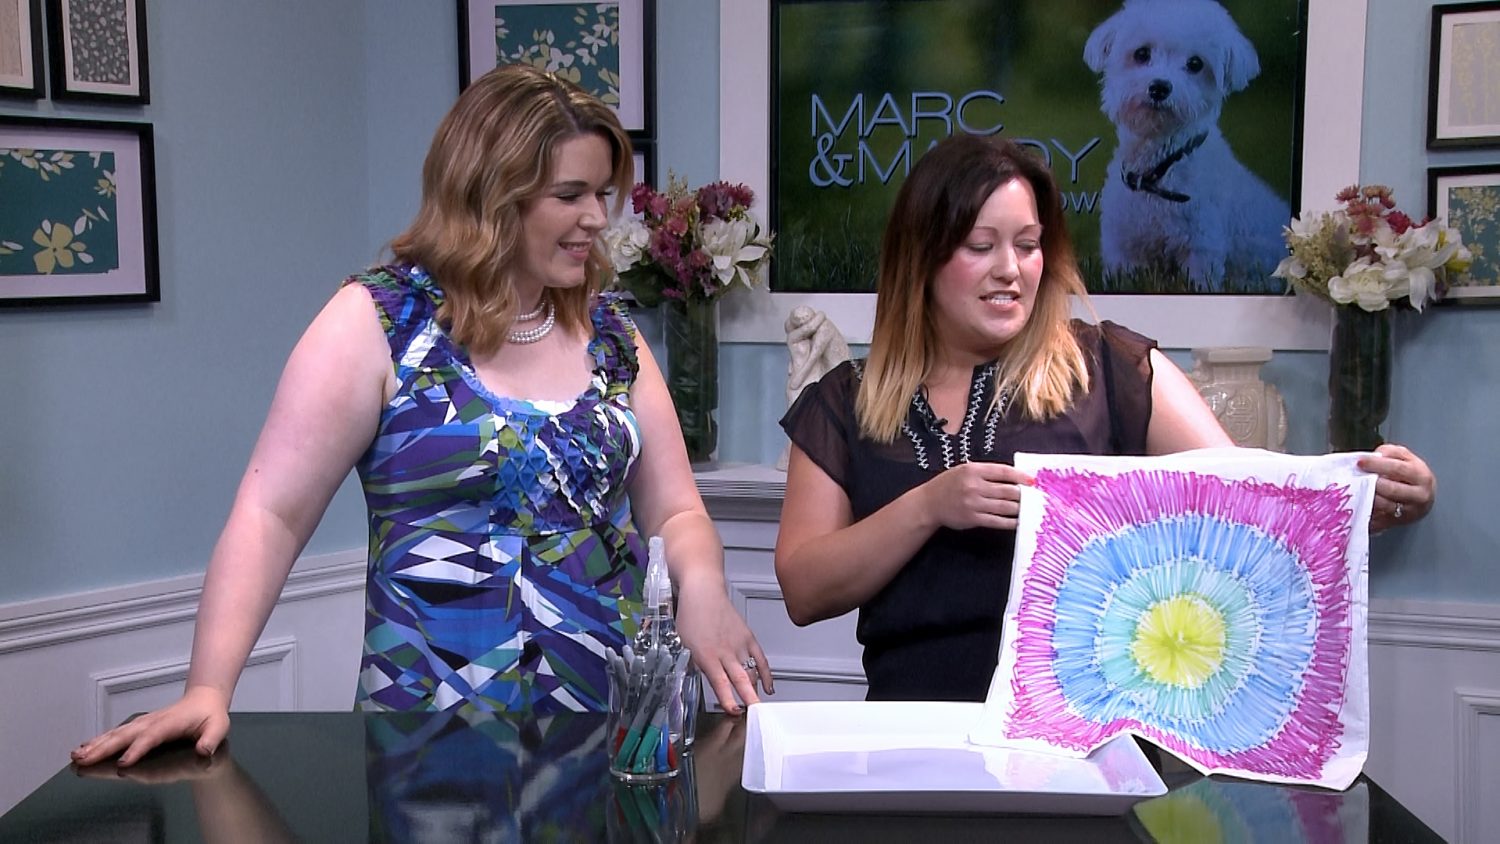
Changing up your accent pillows is a great way to breathe new life into your space, without breaking the bank. DIY Expert, Tracy Smith, shows us one fun, creative, and kid-friendly way to revamp boring pillow cases using a tie-dye method.
If you’re familiar with the concept of tie-dye, you might already know it originated in the 1960s, and typically involves folding, twisting, pleating, or crumpling fabric, as well as working with messy dyes. If you’re already feeling a little wary at the prospect of mess, fear not, because this contemporary method calls for zero messy dyes, and instead employs Sharpie pens and other items you probably already have kicking around your home.
What you’ll need: cotton-based material, Sharpies in various colors, and rubbing alcohol (90% proof)
Step 1: Pre-Wash
Before you begin DIY-ing, you want to ensure your fabric is clean and washed. If you attempt to dye fabric with any existing dirt and oil on them, the dye won’t stick to it as well as it would clean fabric.
Step 2: Color
This step is pretty basic, and involves the simple, child-esq practice of coloring. Use your colored Sharpies to imprint eclectic shapes and vibrant patterns onto your cotton material. Keep in mind that once you soak the fabric in rubbing alcohol, the lines will blend together, so the most important thing is here to deliver color the the fabric in an abstract way.
Step 3: Spray
The next step involves completely saturated your Sharpie-covered fabric with 90% proof rubbing alcohol. TIP As you spray, the color will bleed through the fabric, so place your fabric overtop of a plastic sheet or tray to prevent the color from staining your work surface.
Step 4: Dry
Once you’ve completely saturated the colored area with rubbing alcohol, leave it to dry. You can do this by hanging the fabric, or by laying it flat. TIP for a “dripping effect” simply hang the fabric up and let gravity do it’s thing!
Step 5: Set
To set your design, toss the tie-dyed fabric into the dryer for 15-20 minutes or iron it. Ensure it is completely dry before performing this step.


