Mason Jar Herb Garden
Wintertime is arguably the best time to garden. Not only is gardening good for your soul, but it’s also good for your air quality. One fruitful way hop on the indoor gardening bandwagon, is with a DIY herb garden. Professional horticulturist and landscape designer, Troy Barkman, gives us some expert tips on getting one started using mason jars. Keep reading for a step-by-step.
Step 1: DIY Your Planters
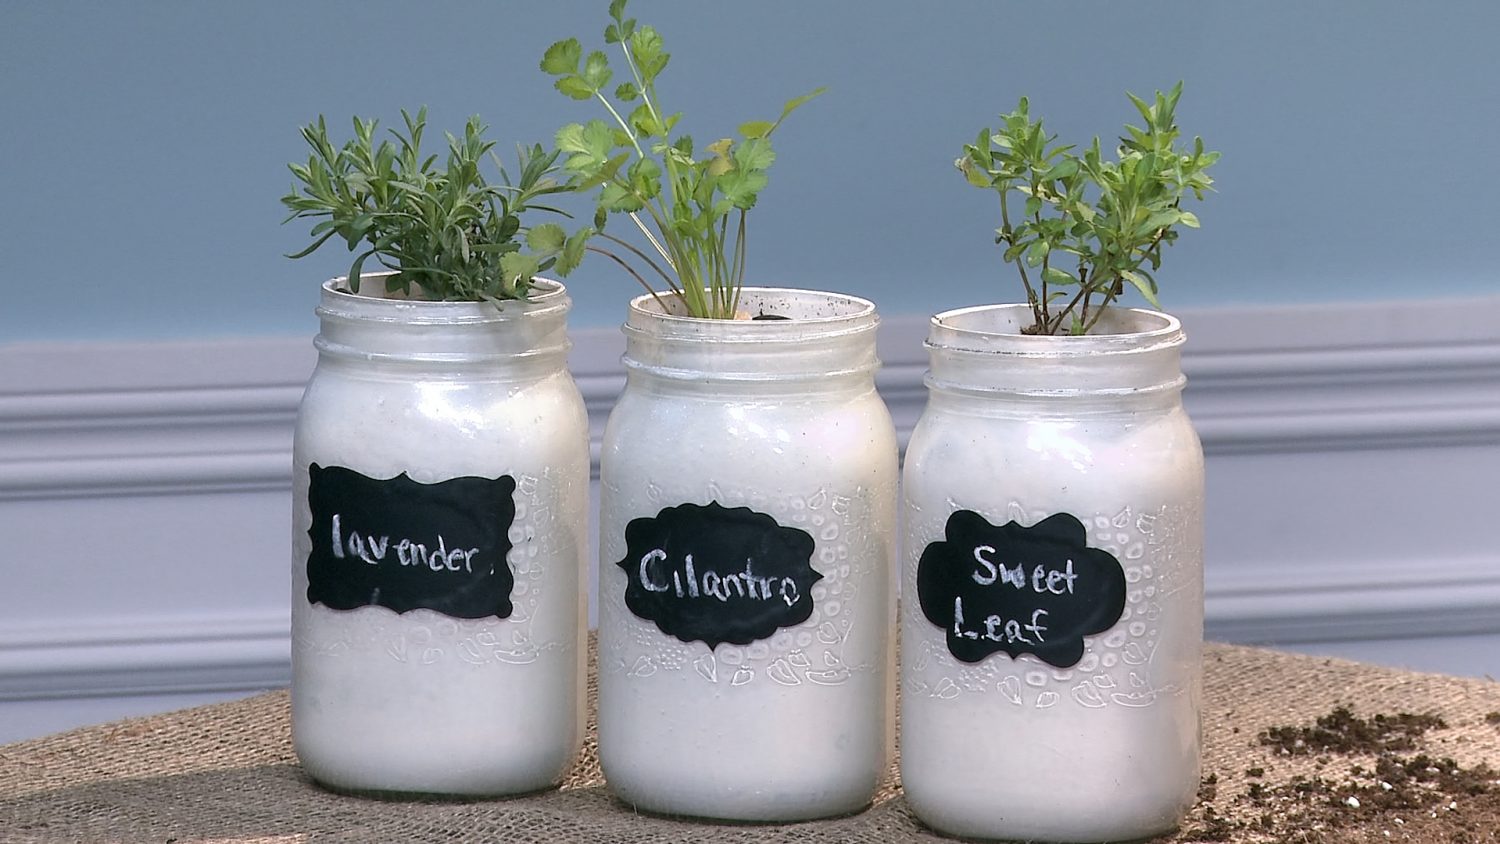
There are a million ways to decorate mason jars, be it with stickers, markers, or paint. One super simple idea is to use chalkboard paint on the outside of your jars so you can easily label what you’re growing and change the label if need be.
Step 2: Set up a Drainage System
DIY-ing a drainage system is a fairly simple affair. All you’ll need is two to three inches of rock, placed at the bottom of your jar. After you’ve added your rocks, it’s time to get your hands dirty! Fill your jar about halfway full with soil, and gently pack it down to make room for your pre-potted herbs.
Step 3: Gather Your Greenery
Displacing your pre-potted plant is not an overly complicated affair, however, you want to be mindful of the roots. After gently removing your plant from its original pot, you want to loosen up the dirt attached to the roots a little bit with your hands, in an effort to encourage the root-to-soil contact.
Step 4: Optimize Growth
According to our expert, all your herb plant needs is two to three hours of direct or indirect sunlight to flourish. Keep your mason jar garden near a window for best results.
