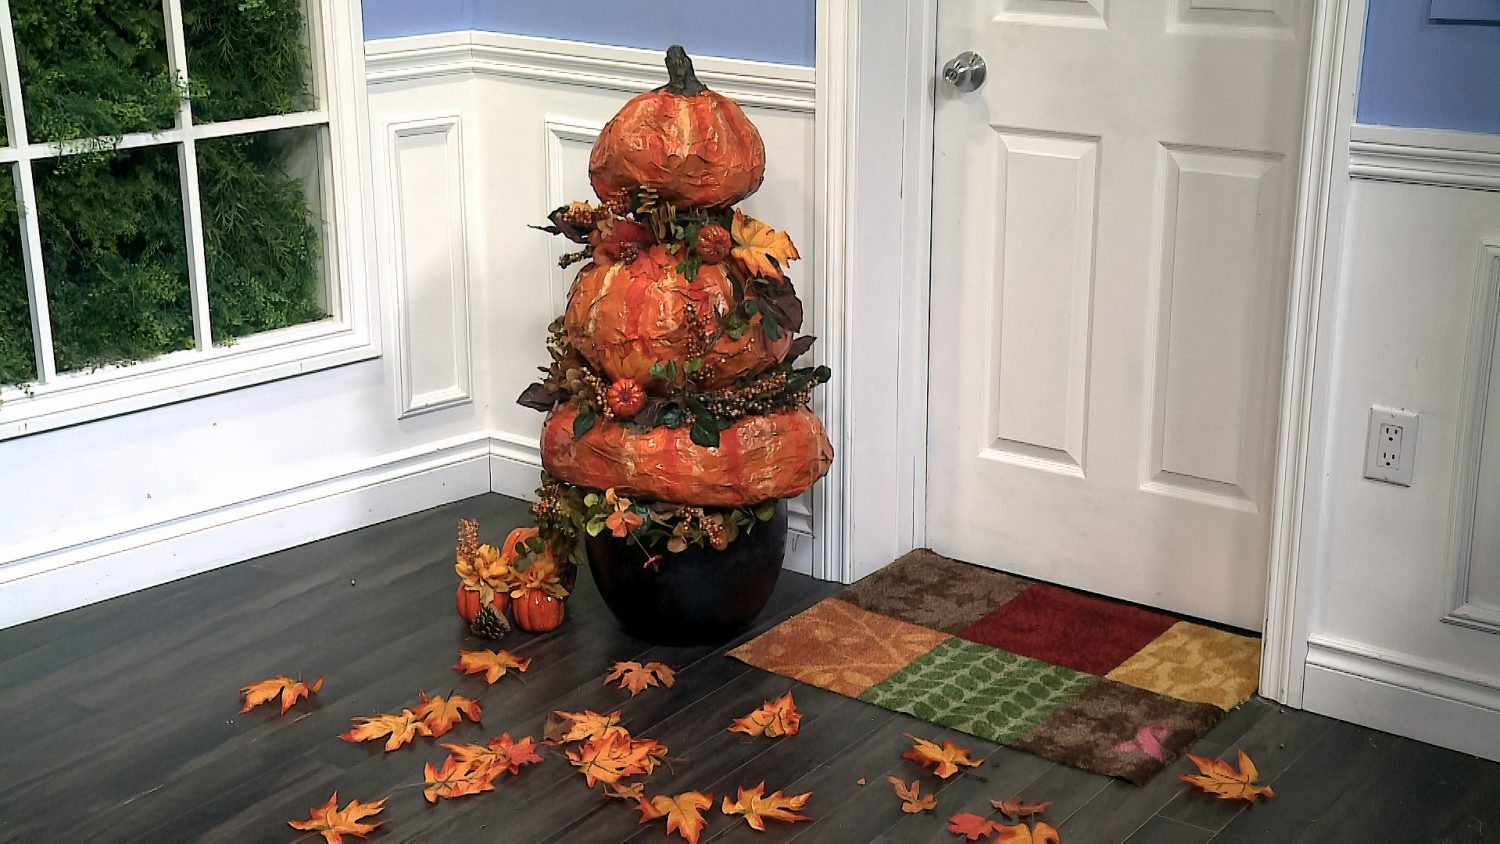
Paper Mache Pumpkin Planter for Your Front Door
If fall is your favorite time of the year, you’re not alone. In addition to being the preferred season for fashionistas, fall is also a beloved one for DIY-ers far and wide. In that spirit, Mandy shows viewers a simple, easy project to do with your kids. Keep reading for step-by-step instructions on DIY-ing a pumpkin planter for your front entrance.
What you’ll need: plastic shopping bag, newspaper, painter’s tape, flour, water, paint, paintbrushes
Step 1: Crumple and Stuff
First, crumple newspapers and stuff them into a plastic bag. Keep stuffing until the bag is full.
Step 2: Tape
Once your plastic bag is nice and full, tie it up at the top. Next, use painter’s tape to create the line depressions hallmark of a traditional pumpkins. You will need four long pieces of tape. Use tape to create a stem at the top of the pumpkin also.
Step 3: Paper Mache
Next, whip up some paper mache by combining equal parts flour and water. Once you’ve mixed up your paper mache, tear strips of newspaper, dip them into your paper mache mixture one by one, and plaster them onto your stuffed plastic bag. Once your bag is completely covered in paper mache strips, let it dry over night.
Step 4: Paint
Finally, you can get started on painting your creation using orange, red, and yellow paint. You can then recreate these steps to create a few more pumpkins, stack them on top of each other, secure the bases with glue, and you have yourself a festive pumpkin platter!


