Pumpkin Craft Ideas for Kids
‘Tis the season for fallen leaves, beautiful colours, and of course, pumpkins. As the weather starts to get chillier and the days get shorter, kids often get bored and don’t know what to do with themselves. Keep their little hands busy with some pumpkin crafts.

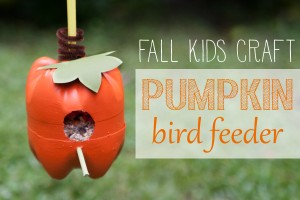
Pumpkin Bird Feeder
A perfect fall craft that can be used throughout the winter. The birds will appreciate the food and kids will enjoy watching the birds gather around their masterpiece. This is the perfect opportunity to talk about fall, what birds eat in fall and winter, what migration is, and where they go.
You will need:
- 2 soda bottles
- craft paint
- ribbon
- 1 pipe cleaner
- 1 wooden dowel
- cardboard or construction paper
CLICK HERE or the image for full instructions
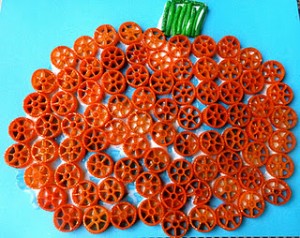
Coloured and Glittered Pasta Pumpkin
Kids love to create things with their hands and imaginations; I know my kids do. In this picture, they used pasta wheel to make the pumpkin shape, but any pasta you have on hand will do the trick. If you choose to use small pasta such as shell pasta, you could get creative and draw several smaller pumpkins. Since this craft requires the use of food colouring, I strongly recommend wearing a smock, apron, or old clothes that you don’t mind getting stained. While colouring the pasta, you could talk about colours and which primary colours combine to make other colours.
You will need:
- pasta wheel
- macaroni
- green food colouring
- red & yellow food colouring – to make orange
- alcohol
- glue
- card stock
- 2 ziploc bags
- glitter – (optional but oh-so-pretty)
CLICK HERE or the image for full instructions
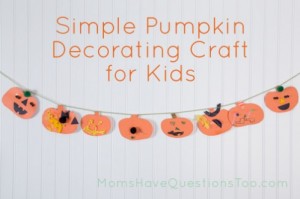
Pumpkin String
The most common answer I get from moms when I ask them why they don’t do crafts with their kids is that it’s too messy, or too time consuming. In the busy, hectic and already messy world of moms, I completely understand where they’re coming from. This next craft doesn’t require paint, food colouring or other messy products. The most time consuming aspect of this project will be cutting out the pumpkin shapes, gathering the supplies, and yes, clean-up afterwards. For the cutting of the shape you can take a shortcut by stacking several papers and cutting many shapes at once. You’re welcome.
You will need:
- construction paper
- yarn or string
- tape (to adhere the pumpkins to the string or yarn)
- glue
- tissue paper
- pompoms
- beads
- crayons
- buttons
- cut pipe cleaner pieces
- foam shapes
- stickers
NOTE: everything after the first 4 materials is optional. Feel free to replace and/or add additional crafting supplies
CLICK the image for full instructions
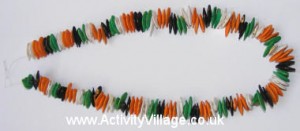
Pumpkin Seed Necklace
I plan on making this with my 4 year old twins and 11 year old. I haven’t decided if I will pre-paint the seeds while they’re in bed or be brave and allow them to participate in that step. For safety reasons, I won’t allow my 4 year olds to string their own seeds, I will string it for them while they “help” me hold the needle or the seed steady. I plan on using this time to have them practice making patterns with the colours, as well as spending a little one-on-one time with each of them. My 11 year old will string his own seeds, with my supervision and with the help of a thimble.
You will need:
- pumpkin seeds (roasted)
- paint (orange, black, white and green)*
- needle and thread
- kitchen foil or wax paper (to dry the painted seeds)
*NOTE: these are the colours they chose to go with a pumpkin/halloween theme, but you can choose any colour you want
CLICK the image for full instructions
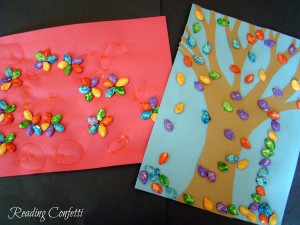
Pumpkin Seed Art
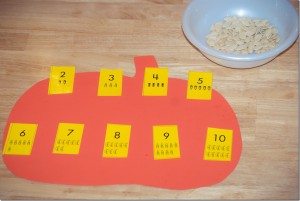
Don’t know what to do with your pumpkin seeds? Create some art of course! This craft is very versatile; they can create whatever their imaginations come up with. When it comes to these kind of projects, I prefer to put the glue in a small container, and let my 4 year olds use a small paintbrush to spread the glue rather than letting them squeeze it out of the container. You could also use this as an opportunity to practice counting. Divide a piece of paper into sections, and tell them to glue as many seeds as the square indicates (as shown in the picture below).
You will need:
- pumpkin seeds
- paint
- ziploc bags
- kitchen foil or wax paper (to dry the painted seeds)
- construction paper
- glue
CLICK the image for full instructions
Pumpkin Play Dough
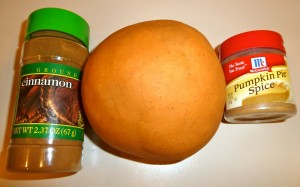
My kids absolutely LOVE play dough. I have made approximately 5 different variations, but never pumpkin. This play dough smells delicious, so make it clear that it doesn’t taste as good as it smells.
You will need:
2 cups of flour
1 cup of salt
4 tsp cream of tartar
6 tsp pumpkin pie spice
3 tsp cinnamon
2 cups of water
2 tbsp oil
red and yellow food colouring (optional)
Cooking Instructions:
combine dry ingredients into saucepan
add water & oil
mix well
cook over medium heat & knead dough
Note: In my experience, it works best to keep the dough in the saucepan until it starts to form a ball. At that point, I carefully, (because the dough will be hot) continue kneading the dough on the kitchen table until it reaches a playdough consistency.
*If stored in an airtight container or a ziploc bag the dough will last a long time*
Felt Pumpkin Faces
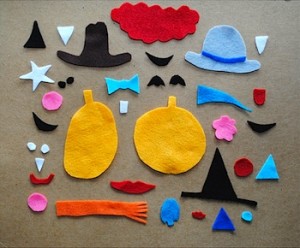
My kids have felt food; pizza, sandwiches and hamburgers, etc. They can play “picnic” for hours together. This is one of the very few activities that they enjoy doing together, that doesn’t end with one, or both of them crying. I love this halloween version. It’s a simple, cheap and “clean” (there’s not much mess involved) craft that they can reuse over and over again.
You will need:
- felt
- scissors
CLICK the image for full instructions
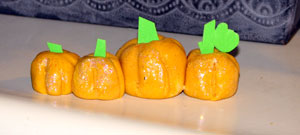
Salt Dough Pumpkins
Sometimes when my kids play with playdough they want to keep their creations, and I have to explain that playdough flakes and falls apart once it dries. Solution? Salt dough. In this case it was coloured with orange paint to create pumpkins, but you can make as many colours as you’d like. It has roughly the same consistency as playdough, except once you’re done playing and you want to keep the final product, you bake it in the oven for 2-2 ½ hours at 200-250°F
You will need:
- ½ cup of salt
- 1 cup of all purpose flour
- orange paint
- ½ cup of water
- glitter glue
- green foam scraps (for stem and leaves)
- craft sticks
CLICK the image for full instructions
NOTE: In the link, it doesn’t indicate what temperature to bake the salt dough, but with a little research I found the most common answer was 200-250°F
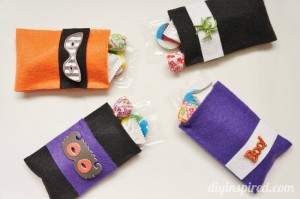
No Sew Halloween Bags
My kids love trick-or-treating and collecting candy from our family, friends, and neighbours. Here’s a cute craft you can make to put the candy in or just cute bag to put toys in.
You will need:
- Felt
- Rotary Cutter
- Cutting Mat
- Hot Glue and Hot Glue Gun
- Halloween Embellishments
CLICK the image for full instructions
