Chic DIY Thank You Cards
Dear Marc:
My kids are home for the holidays and I want to work on a DIY project with them to pass the time. I received a few unexpected gifts from distant relatives this year from whom I hadn’t sent Christmas cards. The holiday season is already in full swing therefore, if I send a card right away, it will get there after the holiday season. I thought it would be nice to follow up with handmade thank-you cards for the gift givers. I have some Graham & Brown wallpaper left over from my living room renovation. Could I use that to make cards?
Lisa
Dear Lisa:
You’re right, the holiday season is in full swing so you have no time to lose. Many family members are off work and at home enjoying home cooked meals, and reuniting after months of preparing for this busy time of year.
As most parents have their children out of school and home for the holidays, the energy at home has all of a sudden come to an all time high. Typically during the first few days, everyone gets along fine. But after numerous days of sleeping in and a couple of relaxing afternoons, little Jimmy might decide he’s bored. His sister, who is off in her room talking on the phone with her friends, is the perfect target to bug. Gabrielle annoyed with her little brother runs after him screaming and our blood pressure rises…
The key to keeping the entire family content throughout the holidays is to have activities lined up and avoid boredom. Children are used to being mentally stimulated day after day in classrooms and on the playground. Do it yourself projects are a great way to keep kids busy and out of trouble.
Create handmade cards with ease utilizing old wallpaper, this process is simple enough to do with kids. For those who don’t have remnant wallpaper, scrapbook paper also works for this project.
The following materials are required for the Wallpaper Thank-You Card project.
– Pieces of wallpaper or scrapbook paper
– Utility knife or scissors
– Double sided tape
– Ribbon
– Scrapbook embellishments (buttons, small paper flowers, etc.)
– Small plain thank-you cards with envelopes
Step 1:
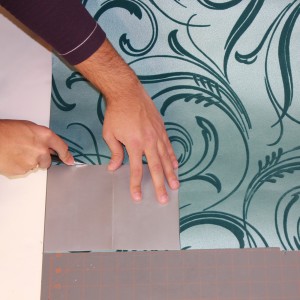
Place a surface protector on your table or countertop. Layer the wallpaper onto the surface. Set the plain thank-you card onto the wallpaper and use it as a guide to cut the paper the right size. Slice the paper with a utility knife. Marc’s Tip: When working with children, opt for scissors instead of a utility knife. Use child friendly scissors so that everyone can feel involved in this project. Mark the paper using a pencil and cut along the lines.
Step 2:
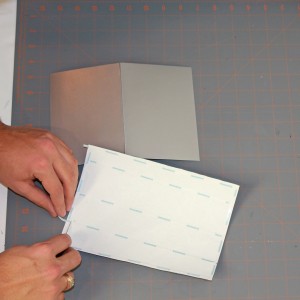
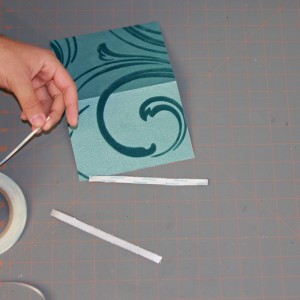
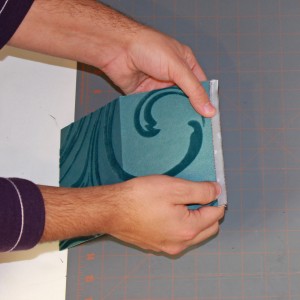
Apply double sided tape to the back of the cut piece of wallpaper. Peel the backing of the tape then, set the paper on the outer surface of the card.
Step 3:
Hide the imperfections with ribbon. Put double sided tape onto the back of the ribbon and apply it to the bottom edges of the card. This helps camouflage slight imperfections.
Step 4:
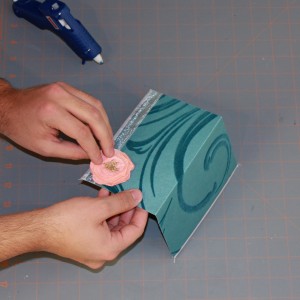
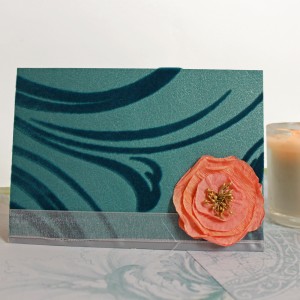
The final touches; depending on the bold nature of the wallpaper, you may need to add a little something to the front of the card. A trip to the scrapbook store will showcase a wide array of card accessories that fit any colour scheme. Once the accessory is selected, glue it to the front of the card.
Step 5:
Personalize the inside of the card with a custom message. Once written, slip the card into the envelope and mail it so they receive it shortly.
Drab to Fab Tip of the Week:
Use kid’s drawings as an alternative paper for the outer surface of the card. This adds an abstract look to the card, making it more personal.
Marc Atiyolil, celebrity designer and home trend expert is the Editor-in-Chief of Home Trends Magazine, and the host of the Marc Atiyolil Show – www.MarcAtiyolil.com. Season 2 airs weekly starting in January 2012.
To submit a question for Marc Atiyolil, visit www.MarcAtiyolil.com
COPYRIGHT 2011 – CHT Media
