DIY: Designer Chic Charger Plates
Dear Marc:
I’m hosting a ladies’ night later this month. We are going to get all dressed up and have a formal dinner. I’ll be using my formal dinnerware and one of the girls is bringing her crystal glassware. I want our dinner setting to be formal although, I’d also like to add my personal touch to it without spending a ton of money. Any ideas on how I can do this?
Sally
Dear Sally:
I love entertaining. What good is design if you can’t share it with the ones you love?
I have fine china that I love to lay out intricately around the table. I do a formal plating arrangement but like anything else I do, I love to change things around. Last year I decided I was sick of the same old look but I couldn’t part with my fine china. I love it too much therefore I put on my thinking cap and worked on ways to change the look of the table.
I love to get the designer look on a dime. There is nothing more rewarding than designing space without having to re-mortgage the house and sell the second car. While browsing at the dollar store, I came across some plate chargers. My eyes lit up like a Christmas tree and I knew I had a “Eureka moment”.
From these dollar store chargers, I built designer chic charger plates just like the ones you see in décor stores.
Here’s how I did it.
You’ll need the following materials for the project.
– Plastic charger plates in the colour of your choice
– White Aerosol paint
– Black Aerosol paint
– Paisley design stencil
– Aerosol clear sealer
– Sandpaper

Step 1: Buy a platter charger plate that offers an adequate lip. Look at the shape and size of the charger. The large scale charger will look more expensive once refinished.
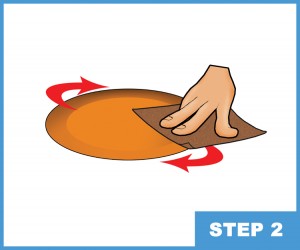
Step 2: Sand the plate with the use of your hand held sandpaper. Whenever you apply paint, you want to create a rough surface. Simply pass the sandpaper in a circular motion across the top and bottom of the plate.

Step 3: Wipe down the left over debris and dust from the sanding process.
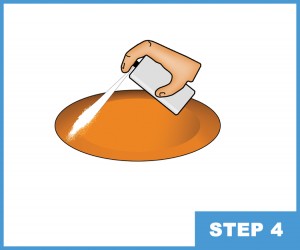
Step 4: Spray paint the top of the plate. You may need to apply 2-3 coats. Be sure to keep the can moving in a linear fashion as to offer an even spread of the paint.

Step 5: Wait till the paint on the top of the plate dries, then flip the charger over and repeat the process on the underside.
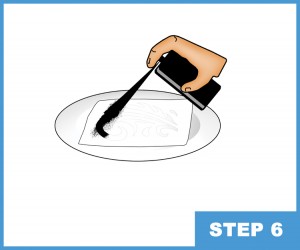
Step 6: Place your paisley design stencil on the top of the charger and use your second paint colour can to apply the design.


Step 7: Spray clear sealer over the top and bottom of the plate.
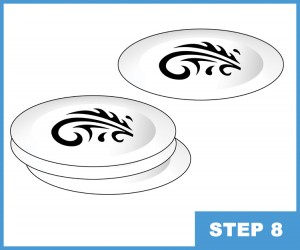
Step 8: Repeat all 7 steps to the rest of your chargers
Step 9: Voilà, your new charger plates are ready to be placed under your dinnerware.
Marc Atiyolil, celebrity designer and home trend expert is the Editor-in-Chief of Home Trends Magazine, and the host of the Marc Atiyolil Show – www.MarcAtiyolil.com.
To submit a question for Marc Atiyolil, visit www.MarcAtiyolil.com
